 |
| Felted garland tutorial from Small Bird Blog |
I have been asked by my friend and artist Fenneke of Fenfolio to sell some of my handmade cushions and vintage wares at a Christmas Fair she's organising in November and I am SO excited about this! It will be the first time I am going to officially be 'out there' with my business and goodies, other than just being online. Eeek! In addition to selling my home decor items I have been browsing the internet loads to find inspiration and cool ideas to create handmade Christmas decoration to sell as well. I have already made some lovely fabric rag wreaths, but am also going to have a go at making tree ornaments and anything else that is beautiful but relatively easy to make. After all, my maternity leave is starting next week, so an ideal time to get cracking with those crafts!
As you're probably not all going to be able to rush down to my stall at the Christmas Fair (but wouldn't that be great!), I thought I share some of the DIY projects I found with you so you could have a go yourself at creating a 'homemade Christmas' this year. Enjoy!
- Fabric covered polystyrene/styrofoam ball
This is one of the things I will be attempting soon; baubles covered in fabric squares. Endless possibilities here with your favourite pieces of fabric! Go to the tutorial

- Using vintage papers
Clear, glass ornaments decoupaged with vintage papers, sprinkled with glass glitter and tied with "Noel" made on a printer. There's no real tutorial here, but I guess it's using the decoupage technique and glue such as Mod Podge to get the paper to stick to the ornaments.

- Clay ornaments with doily print These are super simple to make but oh-so-elegant. The one pictured is featured on the beautiful website of Marley and Locker.
1. Use air-dry clay, roll it out so you have a thin even sheet (about 3-5mm thick).
2. If you want start by pressing a piece of linen or cotton onto the clay to create a textured effect.
3. Press a doily or piece or lace into the clay and carefully take it away to reveal the imprint.
4. Take a small round glass or other shape you like and press it into the clay to cut out the shape. Use a nail or similar to pierce through the ornament so you can put a ribbon through it later.
5. Use rubber stamp letters to create a word or Christmas wish.
5. Let the ornament dry completely.
6. Paint the ornament with white acrylic paint or leave it natural.
7. Fill in the imprint of the word with a darker shade of paint.

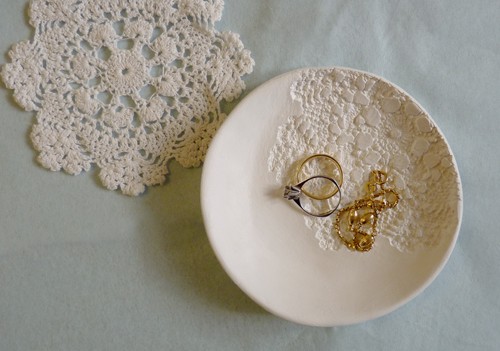
- Clay doily bowls
If you really getting into this technique, why not try these gorgeous little bowls as well?
Go to the tutorial
- Fabric rag ornaments
Couldn't quite find the tutorial to go with these, but aren't they lovely? My guess is cutting out thin equal strips of fabric, then using pins to hold them in place on a polystyrene ball. I'm gonna give this a go...Please let me know if you've discovered a better way of doing this!

- Branch candle holder
No Christmas without candles, so of course I am including a tutorial for a candle holder! This one is made with little twigs and will add a bit of rustic beauty to your home. Go to the full tutorial

What are you going to give a try?
***


0 comments:
Post a Comment